Category Archives: Uncategorized

Entry in ISEA This Year

TFinally decided to enter this year at the last minute.  (Originally thought I wouldn’t enter because the show is in Canada [St. Albert] and the shipping would be prohibitive.)  But, we needed entries, and this would be my 6th acceptance I think. And now, with the advent of the Novel Coronavirus, essentially shutting down everything around the world, the open gallery showing of the acceptances is in doubt.  Sounds like a great place to visit in late August.

img - rising up

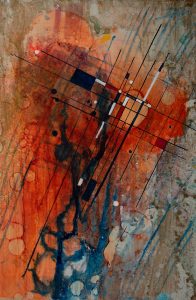
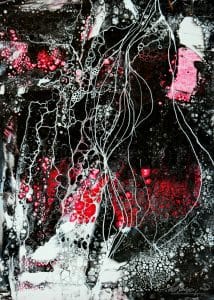
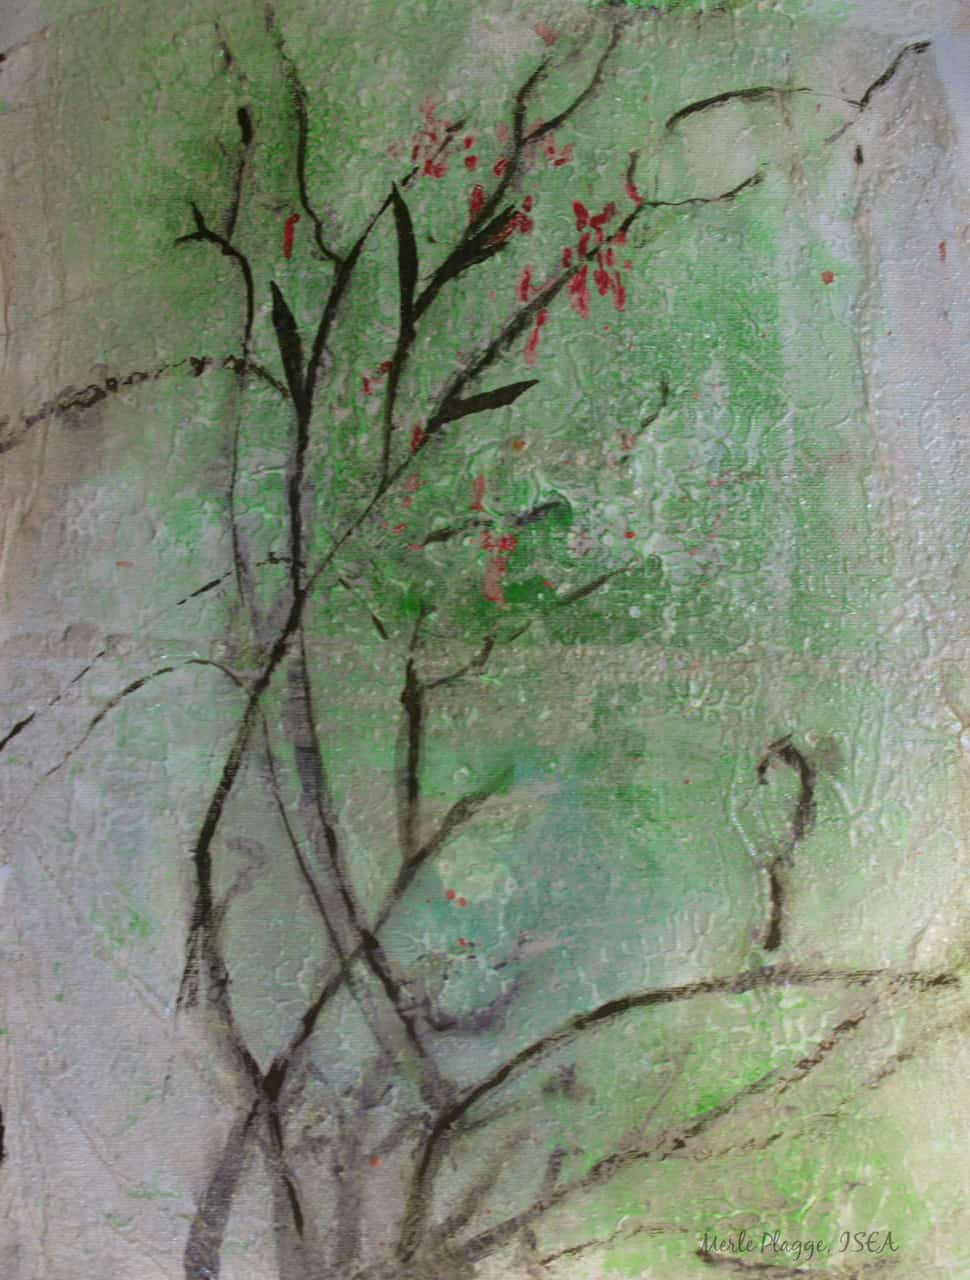
                                                   Rising Up From Ashes

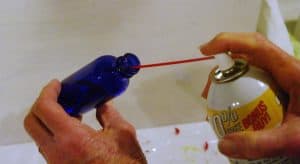
This is an interesting painting from a couple aspects–one it’s done on aluminum flashing, I purchased on a whim at Home Depot. I’d heard about painting on alternative surfaces, so thought I’d try it. Certainly is a stable ground to work on. Then it has a layer of Water Soluble Embroidery Stabilizer, which allows you to paint as if two separate layers on top of each other, sort of like using layers to blend images or parts of images in photo editing. But unlike photo editing each layer is modified by the stabilizer, depending on how wet the layers are when applied. Not a known and precise outcome, which makes it so much fun to work with, and so many possibilities.

Will be interesting if it’s accepted.

Update on Activities This Summer

We had a great trip out west this summer.  Some of the images from that trip show up in my DAILY PHOTOGRAPHS, starting toward the end of July, and extend into August. [Click here:  http://merleplaggeart.com/dir/?page_id=317#foobox-3/32/20180701S3053-RedCapMushroom-w-1.jpg] Many more images are all in one place on my Smug Mug site: https://merleplagge.smugmug.com

Now time to get back to Abstract Art.  Working on a couple new things.

Sketching Practice

At “Art Club” at Portage Senior Center we’ve decided that we all need practice at sketching. We did just simple shapes last week, and this week had a set-up which is interesting. None of us got it anywhere near finished. So, I’ll just post the setup now and later the results.

This is a middle view that I saw from my seat around the table.  The grapes were real, but I’m going to change the time on the clock in my drawing.

Thanks for checking it out. If you would like to have a better (larger) file than this, for your own use, just let me know.  Contact listed on my “About” page.

Workshop – June 25-27

My challenge and theme for this workshop was CONSTRAINTS and how they may make your painting freer and more imaginative.

Had wonderful weather for my workshop this year, although the last day was rainy at times.  We covered lots of topics: some new pour techniques, making collage papers, monoprinting for texture background and spraying oil type paints over wet paper using leaves/flowers as templates,

For my major project this year, I gave each artist  a box of found objects, papers, etc, that they were to use at least 6 of them, in any number of paintings using an image I supplied for inspiration.  Of course, the images were all very abstract and some just highlights and shadows of unrecognizable objects. This was a very difficult project this year.

Here are some pictures taken during the workshop. Many keepers in the mix

Comments or questions always welcomed.

Three New Paintings

All completed this winter and early spring.  This one is called “Transformation” and is mixed media, 15×11″. Includes old house paint and watercolor, gesso and embroidery stabilizer as well as acrylic ink.

This one is “Gentleness.” It’s an acrylic pour done on mat board that was prepared with Gloss Medium on both sides.  The lines added later are acrylic ink, done with an old fashioned nib. It’s 15×11″.

And the last in this post is “Cladonia” which is an acrylic pour on Yupo.  It looks a lot like the lichen “British Soldiers” which is very common in the woods Up North.  It’s 13×10″.


New Acrylic Pour Painting an 8×8″ Tile

This started as an acrylic pour in black, yellow and red.  It was nice cells, but otherwise didn’t have much interest. From another pour I had some drippings that looked like petals, so I added them forming a flower shape.  The center was another piece of “pour puddle” which I enhanced with some brown dots of acrylic.  The acrylic pieces when peeled off the freezer paper they were on, adhered immediately and permantently to the acrylic pour on the tile.   I outlined the whole flower and stem with yellow acrylic and enhanced some of the yellow lines from the pour.  I like it very much now.

Now I’m giving it a couple more coats of UV Varnish and adding some hanging loops on the back, so I can string some picture wire on them and hang it as a normal painting.

Comments appreciated.

Problems With Dirty Pours

People have complained about the smell of using Silicone spray in doing their dirty pours.  The solution is two-fold: Use an already liquid silicone oil, or make your own oil.  I have a 2 oz. dropper bottle that I take outside and spray the silicone from the pressurized container into the  bottle.  This eliminates the odor of the spray itself when using it indoors. Then I can just add 5-8 drops of this silicone to each color cup with almost no odor.

Here’s the way it looks:

Notice the tip of the tubing is a little less than half way into the bottle. This allows the liquid silicone to run into the bottom of the bottle and the propellant to come out without loss of the oil. Also note that I’m spraying into the side of the bottle.

Have you found any other ways of dealing with the odor of the spray?  If so please say in the comments.  Thanks.

Workshop Time

Today was the first day of my 3 day abstract/experimental art workshop. Trying to get everybody loosened up and to think and look at images as non-real things is difficult. Today we did collage papers for use in doing a painting of an abstract image. (See my gallery of Abstract Images as some are in there.)

The gals really worked hard today. Here’s a few shots of the work.

Recent Activity

I entered this piece in this year’s ISEA exhibition at BigArts in Sanibel, FL and received notice last week that it was accepted. So, now the process of varnishing, framing, packing and mailing it off starts. It was started on my spinner after coating the whole piece of Yupo with black gouache and then applying fluid acrylics on top. When they were thoroughly dry I hosed off most of the gouache, and then enhanced some of the other areas by hand painting.

Lines from plant shadows

This piece I started a couple winters ago, by copying shadows cast by a bush outside with an early winter sun. But it just didn’t seem to work. So after experimenting recently with water soluble embroidery stabilizer I applied that over the previous working using a somewhat dilute gesso. This created a great texture as well as subduing many of the lines. Some, I repainted to emphasize them. Just varnished it today, and I have a black frame I’ll mount it in for hanging.

Free Slide Contact Printing Frame

Cleaning out my old photographic stuff, and found these two printing frames, made by Ilford. They have hardly been used.  I hate to throw them away, but If I can’t find a taker in the next few months I’ll have to. They originally cost about $50 20 years ago. All you have to pay now is postage.

I’m sure they are not available in stores anymore.  But in their time they were the perfect solution for creating contact sheets of 2×2 slides. Two trays were printed, which were offset from each other by the width of the slides, so the slides could be printed 35 to an 8×10 sheet.  If you are interested call or e-mail. (269-330-9808 or mplagge1901@earthlink.net)