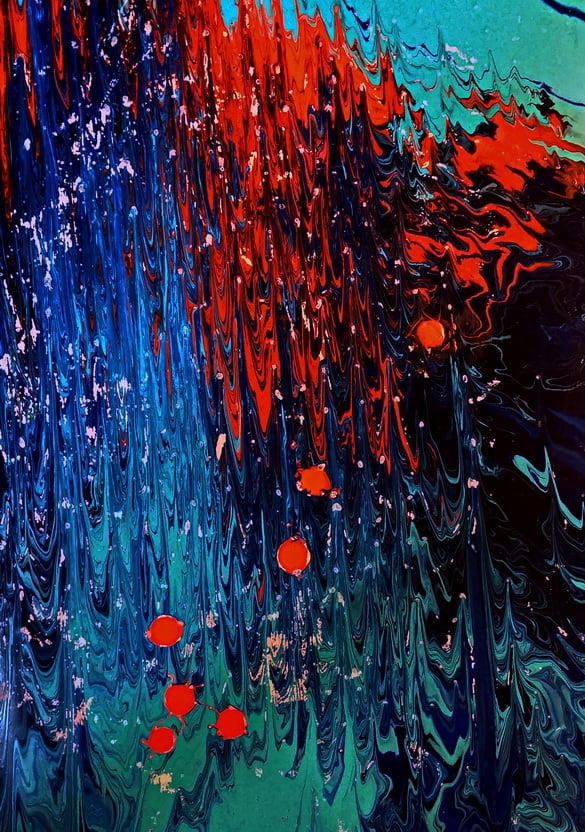
This started out as a quite nice large swipe pour on a 26×20″ Yupo. There were a few details I wanted to change, but started using it as a spot to experiment with. Since then it’s gotten three layers of pours and various other splashes of acrylic paint on it, so it’s quite thick and getting heavy–but I can still lift it, so wil keep going on it. Here’s what it looks like now.
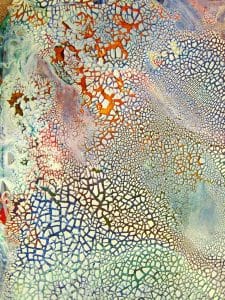
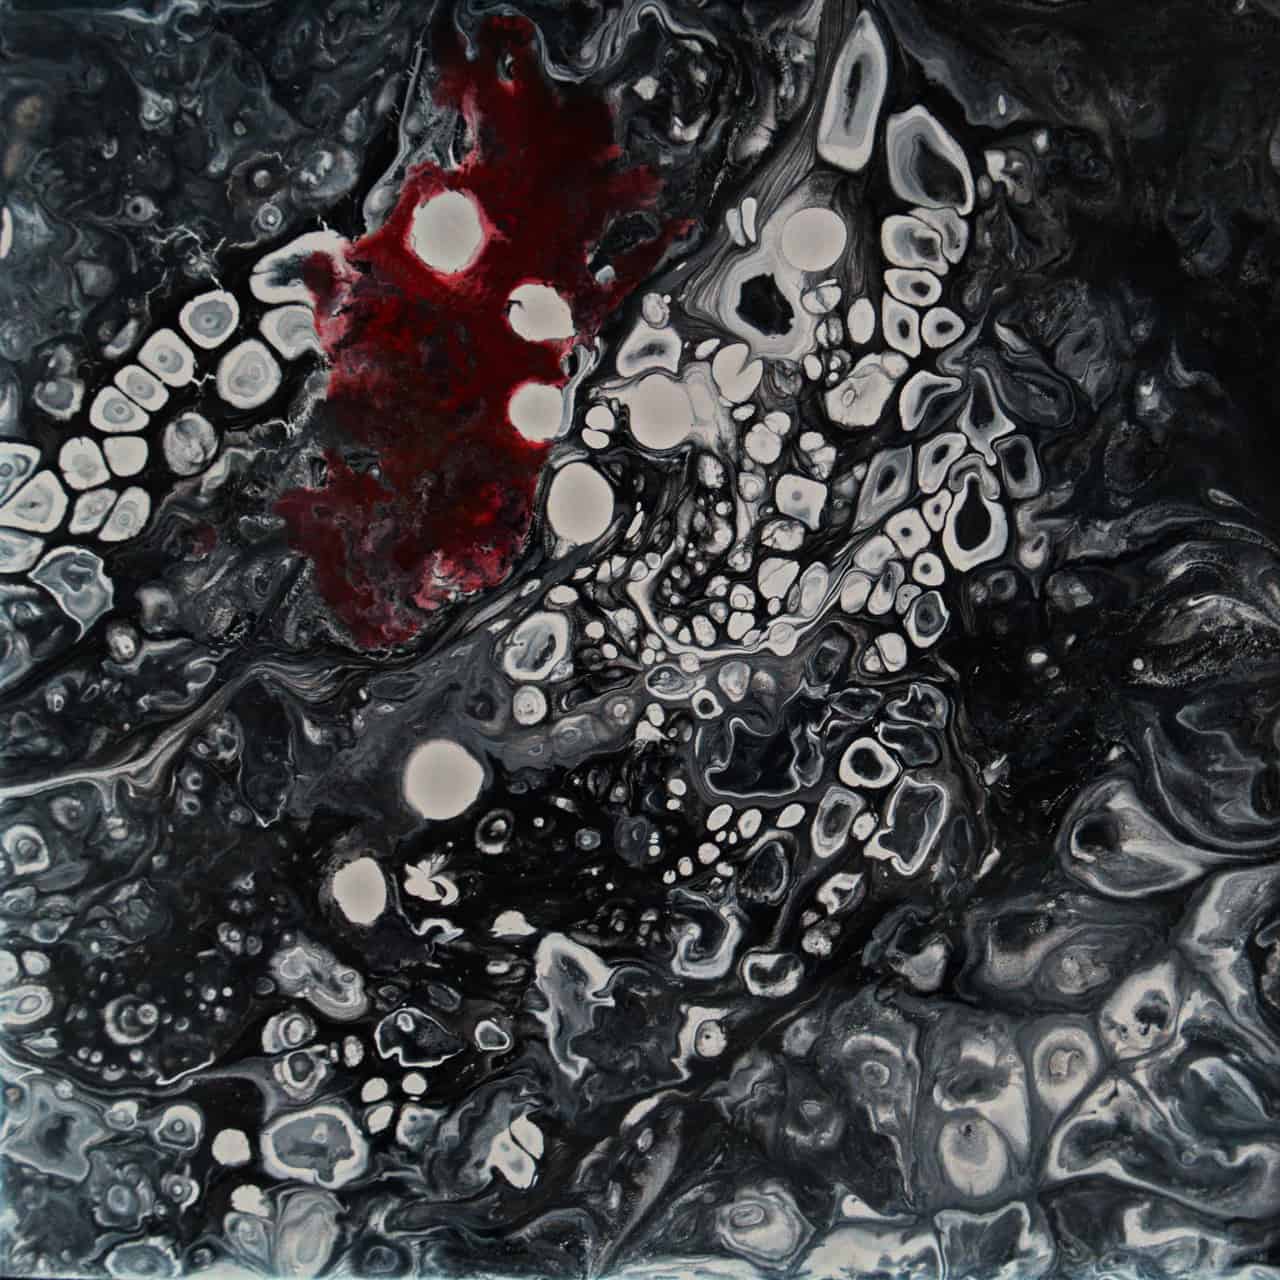
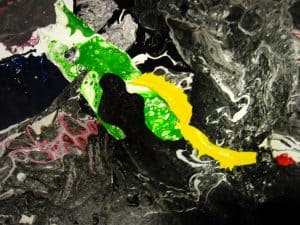
And, below are two close-ups of areas of particular interest, especially from the viewpoint of a pour. You’ll also notice there’s lots of color and contrast, and a marked disjointedness of the whole thing. Here’s those two areas of interest. The first is the right upper corner where I just poured some paint and then moved it around by blowing at it with a straw. I was surprised at the effect this had.
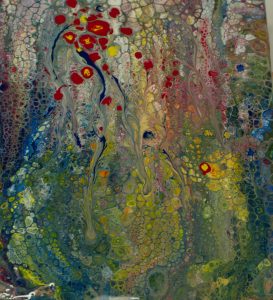
Then, the second one is from the area of the bright yellow patches in the left upper quadrant. Those two pieces of yellow are from the bottom of a cup that had paint from a previous pour. I was able to pull it out, and just pressed it down on the painting. Now I’m going to try and pull it all together using Embroidery Stabilizer.
A Review of methods of producing crackled texture effects in paintings.
Crackle Paste – A Golden product that requires a rigid substrate and thick application. Doesn’t work on Yupo or paper. Somewhat chalky.
Kroma Crackle – from Kroma Industries. Relatively new product. Thinner application and can be used on flexible substrate. Takes a long time to dry–even in the winter time with humidity low in the studio. It is somewhat fragile when it starts to dry. Can easily be limited to smaller areas. Dries to a chalky white color, with the darker color underneath as the cracks. Then it can be painted on top as desired, with either watercolor or acrylic paint.
Kroma Crackle – after completely dry. Cracks vary according to the thickness of the application. A few pieces of the dry compound have brushed off in handling.
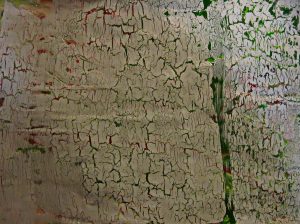
Crackle Glaze – made by Poly Vine Industries. Designed to be used with flat Latex paint. Gives interesting cracked effect. And looks good, and probably can easily be localized as needed and still look natural.
Surface after Crackle Glaze used. On the left hand two thirds it was painted with a very light blue latex interior paint. On the right I used gesso, tinted a bit with blue India ink.
Stamping – totally repetitive and no control over size of crackles. The stamp I have has rather large spaces.
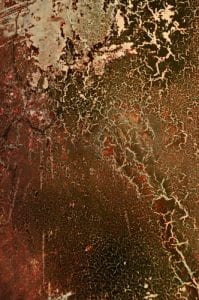
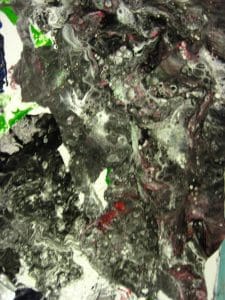
Organic based spray paint over water wetted substrate. Can be on a flexible substrate, but very unstable and fragile till coated with fixative of some sort. I have used this in multiple paintings on Yupo with good, quite subtle results. Generally limited to small areas. Not predictable size of cracks.
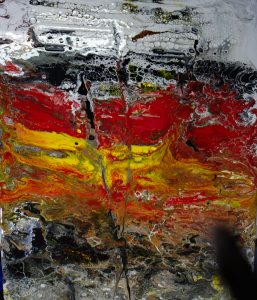
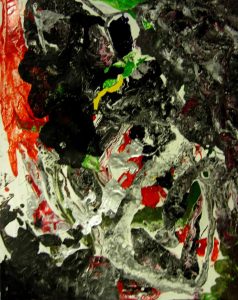
Black commercial spray paint (in pressurized cans) over a wet surface of reddish acrylic paint.
Dirty Pour – simulates crackling a little bit in some areas, but totally unpredictable and very hard to control in all aspects.
Hand painting … very tedious and almost impossible to get looking natural.
Conclusion: come back next time, hopefully in a few days. In the meantime, thanks for reading, and if you have any questions or additions please comment. The link is just under the title.
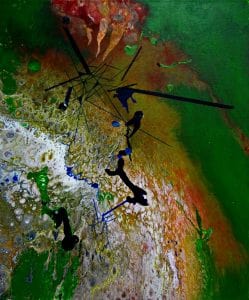
I did a swipe pour on a 20×16″ canvas. I didn’t keep it very level and a lot of the cells just ran off the side. Didn’t like the look of the canvas texture either. I thought it might make a good background for a painting. Started adding things, first some straight lines, and then followed some of the lines in the original background with the same pen. Made a variety of lines, but it still didn’t seem to say anything. Went back to look at some of the freezer paper that had all the drippings/skins from previous pours, and found just the right colors. Since they were a couple weeks old, they peeled off the paper easily and I applied them directly to the background. They stick well when pressed down. Don’t leave them too long as they become permanently adherent. So, now I’m not going to throw any papers away that have drips on them.
Here’s the result so far. I’m going to add some more details to it with skins before it’s finished. I think it’ll be called High Wire Act.
Paint skins from drips off dirty/swipe pours.
Thanks for reading. I hope this was helpful and gave you some ideas. If you have any comments or suggestions please say in the comments.
Just got back from a great experience painting with Helga Flower. (http://www.helgaflower.com/HFBiopage.html and https://www.facebook.com/helga.flower.9)
We played with pouring techniques. She had a piece of thick foamcore board 30×20″ and I decided to try a swipe pour. Mixed up a about three hundred ml of red, yellow, black and white paint with PaintEasy, water and silicone. Everything worked well, and I stabbed into the painting with the edge of a piece of Yupo I was using for the swipe. Only problem that happened was the bending of the Foamcore from the wet media. All the beautiful cells in the lower part didn’t stick around. But, it’s still nice. I’m thinking Yupo may be better for doing large pours because it doesn’t curl when wet.
This is a piece about 9×12 of Yupo that we did a preliminary pour with. It did not curl at all, and didn’t loose any cells over the edge.
This picture was taken just after completing the pour. I had to take it a quite an angle to prevent glaring from the overhead light.
The main star of the show was this piece–30×20″
Again, tremendous glare from the above light, so it’s a little distorted and I got a dark spot (shadow) on the lower right. Helga’s picture later is much better. (She has it posted on her Facebook page.) Since this was on 1/2″ Foamcore board we didn’t think it would bow out, but it sure did, and it lost a lot of the cells on the bottom and in the red area.
We used a formula of 2 parts paint and water mix (the paint I was using was old and quite thick, so I diluted with water to normal fluid acrylic thickness), and then mixed this two parts to one part of PaintEasy. [Or approx 30% PaintEasy and 66% fluid acrylic paint.] PaintEasy is another product that is much thinner than Floetrol, so less water is needed for the final mixture.
Some other pictures from our Soo adventure are here (click on the picture below to see all the others.)
Helga & I With the Large Pour
Evaluating the painting, and wondering how it will dry.
Nice Skins For Collage Developing
Big puddles of paint are most often left behind. They make great skins to use in collage work. This is from another pour I did before the big one.
20170916S1243-SwipePourOnFoamcore-w
9/17 Mackinac Bridge Work
Painting on the bridge goes on every year--all summer.
9/16 The Antlers Restaurant in Sault Ste. Marie, MI
It's been more than 20 years since we were there, but some things have changed. There's new owners, but the bar and restaurant are about the same.
We spent all day working with acrylic pours. My first demo of this was yesterday (first image below), and today I initially went over the steps in detail, then decided to experiment a bit–did a demo using FW Acrylic Ink mixed with Floetrol. Used all ink, including the white. Since the inks were less viscous than the mixed acrylic paint, I decided that the addition of the thicker Floetrol would be better. It worked fantastically, drawing ooh’s from the gals watching. And the cells remained pretty stable. I must admit it did use a good 10 drops of Silicone. (Second image below)
We had three different kinds of mixtures being used today, all giving about equally good results. One was using PVA glue mixed with water and liquid Silicone. Another was using PaintEasy and silicone spray, I was using acrylic inks and Floetrol. The determining factors in the types and sizes of cells seemed to be three things–one the thickness or viscosity of the acrylic mixture, and two, the amount of paint used, and thirdly, to a lesser degree, the amount of silicone used.
Some images of different pours.
Sue Swipe Pour Paint Easy
Beautiful pour, using Pain Easy. She initially had problems swiping it, but after a couple trys and adding more paint got this beautiful result.
Linda Swipe Pour
This is a swipe pour using PVA glue (Elmers) diluted with water and thinner tube paints and silicone.
My Swipe Pour
I did this swipe pour as a demo to show how to do swipe pours. . Used FW Acrylic ink and Floetrol and silicone. It was on a rather thin hardboard that I had a couple coats of gesso on from and back.
Marge Dirty Pours
This was using PVA glue and spray silicone, pour done on an 8" tile.
8/23 Colorful Driveway Again
A little windy today also. But beautiful cloudless sky that dried things well.
Tomorrow we’re going to be using the collage papers from yesterday to do an abstract image, inspired by a photograph from me.
This seems to be the newest fad in acrylic painting. It can produce some beautiful pieces. It’s easy to do on a small scale, but very difficult on larger canvases. I did this using acrylic paint and Paint Easy to thin the paint, and silicone spray. I have not seen any mention of using Paint Easy to thin the paint, but it seemed to work well. It’s made by Wagner Spray Tech Corp, and can be purchased at Walmart stores. Another diluent is Floetrol by Flood, which is made by PPG. I just purchased some from Amazon, but I think Home Depot sells it also.
These are 8″ tiles (doesn’t matter what color they are). I then varnished a couple coats with Golden Polymer Varnish with UVLS. I like this varnish–produces no brush strokes and is an archival finish that can be removed and replaced if dirty after years of display. One piece of advice–photograph them before varnishing them, particularly if you use a glossy varnish. It’s very difficult to get rid of the shiny highlights from your photograph if it was taken after varnishing.
This is a very unpredictable way of doing paintings, and I’d like to find a way to make better designed paintings with it. I’ll keep working on it. Check out the other couple other images in my gallery of paintings also.
I’ve been trying to reduce the number of started paintings that have good potential, and this is one that I started at a summer workshop. The composition just didn’t seem right. So I added another dot of orange paint and cropped the length a little. I like it now.
It was done with three colors–two analogous and one opposite. A dark and light blue along with the orange, all sing together.
I notice some deterioration of the image from rubbing against other papers in the flat file. These images need a varnish protection before storing to prevent this from happening. (See Post of October 3, 2012 for initial photo–) Continue reading Another Finish→

 Now I’m going to try and pull it all together using Embroidery Stabilizer.