Category Archives: Photography

PART III: LIGHTING AND POST PROCESSING

Lighting Requirements
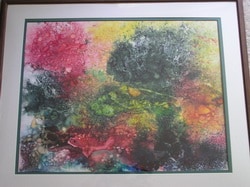
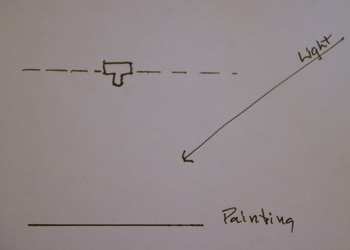
The best lighting is bright clouds outdoors.I often do my photography in front of a large West Facing window which gives about a 45 deg angle to the light. I avoid taking any picture when there is direct sunlight falling on the floor where I do the photography. This will give you the truest white balance and best likeness of your art work with the least requirement for post processing. When photographing indoors or in bright sunlight.specular highlights are sometimes difficult to avoid. If you are using artificial lights indoors, have the lights on either side of the art work and at a 45 degree angle to the painting. (See drawing in Part I) This makes the highlighting problem much less.

If you are photographing a 3-D piece some shadow is desirable–it gives shape and form to the piece. Do not use on-camera flash for any art photography. It is usually unnecessary and gives horrible, flat, frontal lighting and often times a lot of specular highlights.

Post Processing for best likeness.
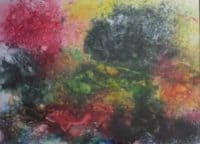
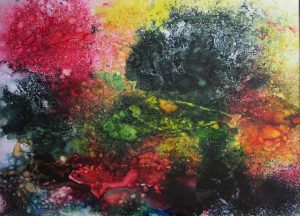
If you have had adequate lighting, so that you have a well exposed image with normal appearing white balance your work is almost done. You will need to adjust the size of the image to fit the requirements of the venue it’s going to be entered. Above all make sure it is straight and no frame or background is showing and that it looks like the original art work. If the image looks blurry, retake the photo of your piece. There is no fix for blurriness.

Questions–please open a discussion in the Comments.

PART II – PHOTOGRAPHING YOUR ARTWORK

First–A a couple pictures of the problem of photographing your image after framing in glass or Plexiglas.

Here’s a photo of a painting after framing.

Photographed AFTER Framing

Best results with post processing on framed first image.

And Here’s before framing. What a difference.

Camera Requirements and Basic Settings
Most newer cameras, including cell phone cameras do a great job with recording your image if you have heeded the preliminary requirements listed in Part I. If your venue requires images suitable for publishing in a catalog a phone camera usually produces images which are a little on the small side. The image file after processing needs to be 0.8 to 1.5 MB in size. Having a camera with an adjustable shutter and lens aperture will make the process much easier in every step, and give you sufficient size for publication.

You will need some means to hold the camera steady with the sensor plane parallel to the painting surface. If you have good lighting your shutter speed will be fast enough to hand hold. There is no need for extra depth of field, so use an aperture that’s wide open, and set your camera on Aperture Priority. Set the ISO no higher than 400. If you are photographing several paintings, mounting your camera on a tripod will help speed things up.

If your piece is mostly white or light colors, you may need to increase your exposure a little if possible, as your camera’s exposure is based on 18% gray, which is darker than light colored paintings and lighter than dark color paintings. If the image is too dark and no way to set the exposure, it can be corrected on your computer later. Also for overexposed images with dark or black pieces you may need to decrease the exposure if possible.

When you photograph 3-D pieces you need to make sure your background is bare. Hanging a black or white cloth so that it covers the entire field of view of your camera is an absolute necessity.

Next time I’ll wind this up with a couple notes about post-processing.

PHOTOGRAPHING YOUR ARTWORK

I want devote a couple posts to talking about photographing your art work. In this digital age, most organizations require digital images for entry into juried and non-juried shows. Also, it’s a must for documenting your work, should it ever be sold, donated or given away or stolen.

Part I
Important Points in the Process of preparing an image for juried entry:

1. Read the Instructions from the venue carefully. You have to know the requirements of organization or web site. – Most will specify the size, the digital format required (most use JPG) and naming of the file. All of these requirements will need to be met using some software on your computer. Common free programs include, Irfanview, Xnview and GIMP and Picassa. (However I don’t recommend Picassa because it strips the EXIF information which may be required for some entries.) Other programs that entail some expense in order of increasing complexity (and expense) are, Photoshop Elements, Corel Paint Shop Pro, ACD Systems, Serif PhotoPlus, Lightroom and Photoshop Creative Cloud. All of these I think are available in MAC and Linux versions also.

2. Record your image before it is framed. I can’t stress this enough. It’s almost impossible to avoid reflections, frame edges and get correct color balance if the painting is framed. Three-D art work has special needs for even lighting with some shadows. (See suggestions under #4 below.) A good accurate image will help your entry.

3. Make sure your camera looks at your painting exactly square on. (See my drawing–notice the plane of the sensor is exactly parallel to the plane of the painting.) The more accurate you do this now in the camera the easier and quicker it will be editing it later in the computer.

4. Lighting is important for 2-D work as well, most importantly so you don’t get specular highlights from a shiny painting). I use natural daylight as much as possible–either in front of a large window, or outside in the open shade. Cloudy days are especially good because the light is more even, and you don’t have to worry about shadows and a slight blue tint you will get in open shade on a sunny day. Make sure there are no shadows on your work–the results of which on your work are almost impossible to correct in free programs. With 3-d art, some shadows are advantageous in defining the shape and contours of the piece, so some directional light is necessary.

In the next post I’ll mention a bit about cameras and settings.