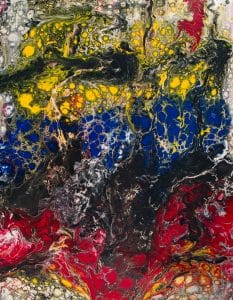
Yesterday was another workshop on Acrylic pouring techniques. We started in the morning with 8″ tiles. I did a quick demo using a previously used wood panel. Then I prepared full cups of five paints–white, black, red, yellow and blue. Diluted them with water and PaintEasy, added some silicone, but ran out, so I used some RainX I had.
This is after it had dried some, but still has a long way to go. Can change a lot.
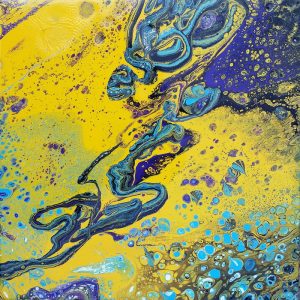
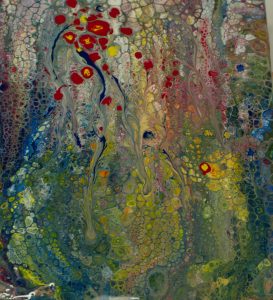
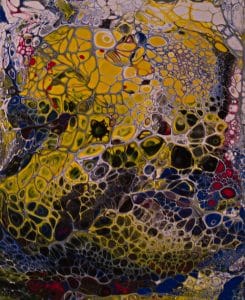
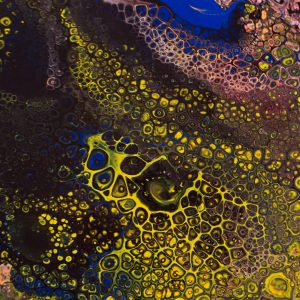
I did the pour on a sheet of Yupo (26×20″ ) supported on a 3/4″ insulation board. Amazingly this stayed flat during the drying process. I put it out in the sun in the afternoon, but didn’t have it perfectly level, so had a little running before it stabilized. It is still beautiful, especially if you like bright saturated color. Later I tried a pour using some of the same colors but added some metallic bronze as the predominant color, on a 1/2″ Foamcore board. Remind me not to use them again. Within a couple hours it wa shaped like a bowl and the metallic paint seemed to want to turn to mud. Boo hiss!!!!
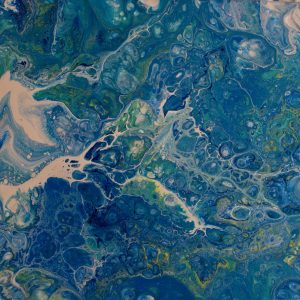
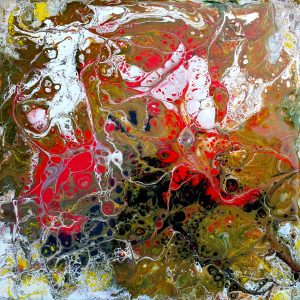
Here’s a couple of the student pours.
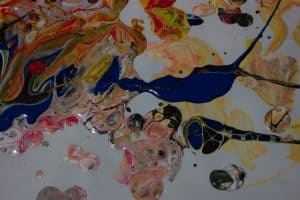
One of Carrie’s pours. She did three others in the same color scheme.One of Linda’s PoursShe used an unconventional approach. After failure of her first pour on this tile (mud), she poured some pure colors on top, and then heated it. What a nice tile she has–surprised us all.
Just got back from a great experience painting with Helga Flower. (http://www.helgaflower.com/HFBiopage.html and https://www.facebook.com/helga.flower.9)
We played with pouring techniques. She had a piece of thick foamcore board 30×20″ and I decided to try a swipe pour. Mixed up a about three hundred ml of red, yellow, black and white paint with PaintEasy, water and silicone. Everything worked well, and I stabbed into the painting with the edge of a piece of Yupo I was using for the swipe. Only problem that happened was the bending of the Foamcore from the wet media. All the beautiful cells in the lower part didn’t stick around. But, it’s still nice. I’m thinking Yupo may be better for doing large pours because it doesn’t curl when wet.
This is a piece about 9×12 of Yupo that we did a preliminary pour with. It did not curl at all, and didn’t loose any cells over the edge.
This picture was taken just after completing the pour. I had to take it a quite an angle to prevent glaring from the overhead light.
The main star of the show was this piece–30×20″
Again, tremendous glare from the above light, so it’s a little distorted and I got a dark spot (shadow) on the lower right. Helga’s picture later is much better. (She has it posted on her Facebook page.) Since this was on 1/2″ Foamcore board we didn’t think it would bow out, but it sure did, and it lost a lot of the cells on the bottom and in the red area.
We used a formula of 2 parts paint and water mix (the paint I was using was old and quite thick, so I diluted with water to normal fluid acrylic thickness), and then mixed this two parts to one part of PaintEasy. [Or approx 30% PaintEasy and 66% fluid acrylic paint.] PaintEasy is another product that is much thinner than Floetrol, so less water is needed for the final mixture.
Some other pictures from our Soo adventure are here (click on the picture below to see all the others.)
Helga & I With the Large Pour
Evaluating the painting, and wondering how it will dry.
Nice Skins For Collage Developing
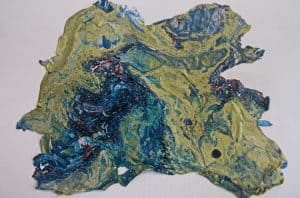
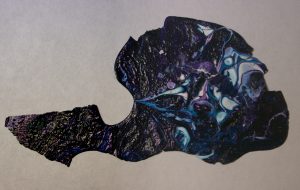
Big puddles of paint are most often left behind. They make great skins to use in collage work. This is from another pour I did before the big one.
20170916S1243-SwipePourOnFoamcore-w
9/17 Mackinac Bridge Work
Painting on the bridge goes on every year--all summer.
9/16 The Antlers Restaurant in Sault Ste. Marie, MI
It's been more than 20 years since we were there, but some things have changed. There's new owners, but the bar and restaurant are about the same.
Finished a smaller piece yesterday. Again, this one has had not quite nine lives. But, each layer I’ve added adds to the whole. This one has had water soluble embroidery stabilizer applied over a couple of failed layers. I really will take some pictures of that process and explain it in a future post. Just don’t have the proper documentation right now.
Here’s the piece–I’m calling it “Pollination.” Some of the previous layers show through–only if you know what those previous layers were.
This afternoon I mixed a good amount of paint for pours. I used Dick Blick student grade fluid acrylics. They are quite old and were a little thicker than when purchased a couple years ago, so I mixed a little water in also. I mixed all 5 paints the same way.
1. 60 cc. of paint
2. 30 cc. of PaintEasy
3. 4-5 cc of water as needed to thin it down to what I estimated the original viscosity of the paint was. I used, Titanium White, Ultramarine Blue, Magenta, Chrome Yellow (Probably a Cad Yellow-looks like it) and Mars Black.
4. Added 10-14 drops of Silicone. The silicone I use is from a spray that I spray in a larger bottle and then add to a dropper bottle. This technique keeps from getting all the chemicals in the spray indoors, as I can spray it in the bottle outside.
Here are some pictures of the pieces I did. First though my setup.
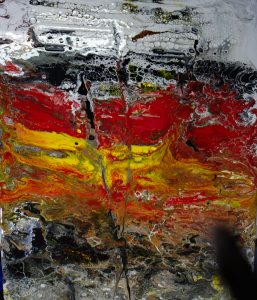
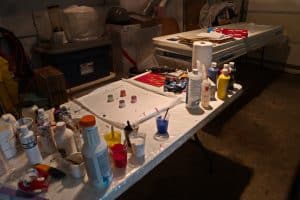
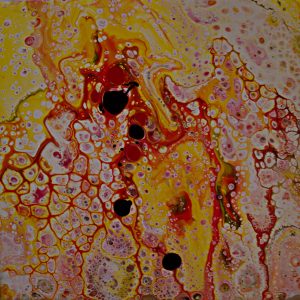
This shows my setup for the pours. The table in the distance is for collecting the completed pieces. It is very level.This was my first pour today. White, yellow and red. Added a couple drops of red and black afterwards.Swipe pour on a piece of hardboard that had been sealed with Gesso, and then i sanded the Gesso.Was running out of white, so mostly yellow and black and some blue and a couple drops of red and white.This was the last pour I did from that same mix of paint. Only had a few drops of white, lots of black and a little red and blue in the mix. This actually is an 8″ tile, but distorted because of the angle I had to take it to avoid reflections. I corrected it some, but didn’t want to loose any of it. I’ll get a better shot when it’s dry.This is a shot of multiple drips from multiple pours this afternoon.
You can see from the last two that white is NOT necessary in every pour. You can get cells without the white, and I think they’re even better than with white.
Please add your comment or questions about my techniques.
Many aren’t bothered by the relatively large amount of acrylic paint and thinner/polymer emulsion mixture that is essentially wasted as it runs off a painting. To me, it’s not wasted. Initially I just put some newsprint under my tiles or canvases and threw it away after it was dry. Then I decided to try putting Freezer paper under the canvas and thus able to make use of the pour excess, since other skins I’ve made for collaging were made on freezer paper.
It works pretty well, but there are two things that are quite different from using straight acrylic pain for the skin. 1.) The skins are quite thin when dry and are thus quite fragile. 2.) They take a long time to dry. These two skins I’ve had out in the sun most of the day for almost a week, and they finally have matured/cured enough to remove from the freezer paper. Also I noticed that those skins from FW Acrylic Ink are very brittle and don’t survive removal as well as those from Fluid Acrylics.
So, when trying to salvage some skins for your pours, don’t spread them out. The quite thick puddles will flatten to normal thickness when dry. And, don’t try to remove them until they are finally dry and cured.
Here’s a couple of skins I just today was able to remove from the paper. The first is from fluid acrylics and PaintEasy. It’s quite thin, but will make a good piece in the right spot.
Acrylic skin from a Dirty Pour about a week ago. It is about 6 inches in size.
The second is from a pour using FW Acrylic Ink and Floetrol. It is a little thicker, but somewhat brittle and needs to be handled with care. It too will make a good piece in the right spot. It is a little smaller (about 5×3″) than the first and quite a bit more shinny than the first.
From acrylic pour using FW Acrylic Ink
Have you tried saving these for late use in paintings? Let me know.