All, completed this past winter and spring. I’ve been working with watersoluble embroidery stabilizer and the possibilities of using it on old failed paintings. All three of these have been done previously on stretched quarter sheet 140lb Arches paper. All are done with water soluble media as well as art markers and the embroidery stabilizer.
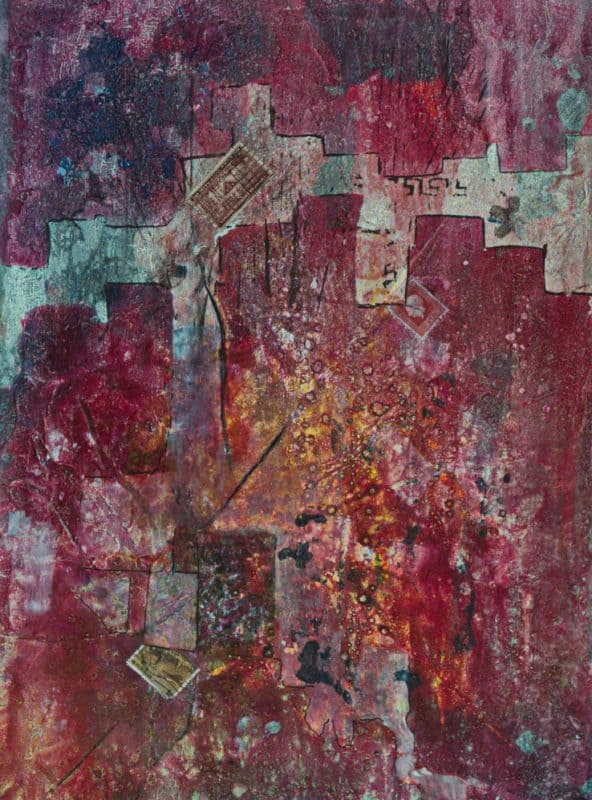
This is called “Cracks” AND I think it has two layers of failed paintings underneath.
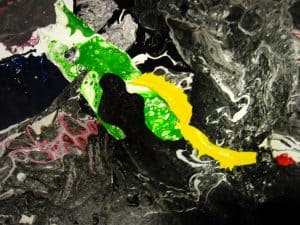
This is “Alien House.”
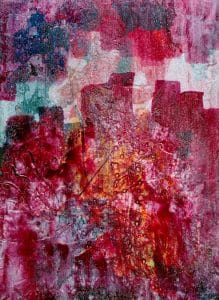
And this is “Acentric Heraldry” and has a couple of layers underneath as well as some thick collage which adds to the texture of this top layer. The small centers of the black spots are pieces of gold colored ribbon.
I still have about five or six more that are not quite finished, but will be soon, and I’ll present those next.
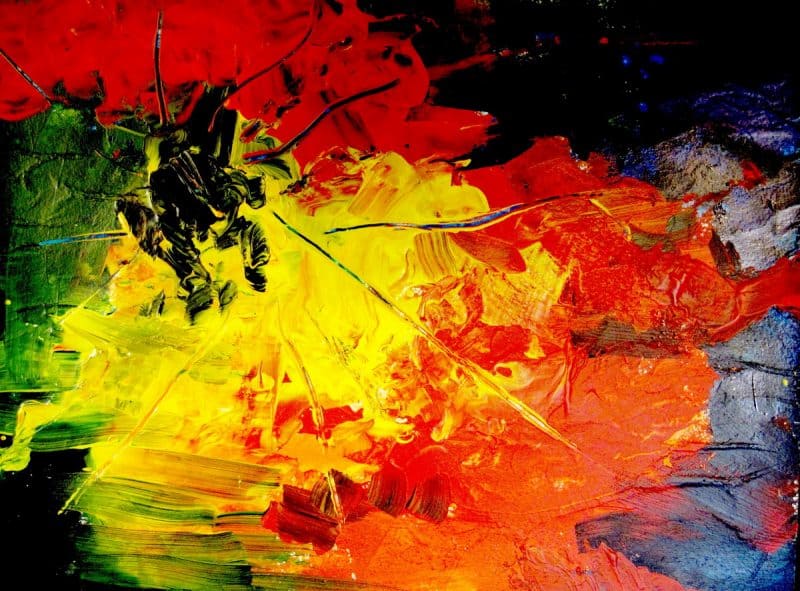
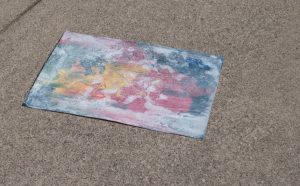
This started out as a quite nice large swipe pour on a 26×20″ Yupo. There were a few details I wanted to change, but started using it as a spot to experiment with. Since then it’s gotten three layers of pours and various other splashes of acrylic paint on it, so it’s quite thick and getting heavy–but I can still lift it, so wil keep going on it. Here’s what it looks like now.
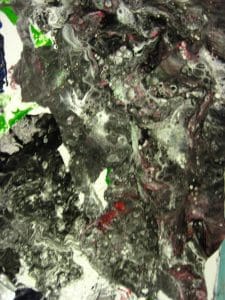
And, below are two close-ups of areas of particular interest, especially from the viewpoint of a pour. You’ll also notice there’s lots of color and contrast, and a marked disjointedness of the whole thing. Here’s those two areas of interest. The first is the right upper corner where I just poured some paint and then moved it around by blowing at it with a straw. I was surprised at the effect this had.
Then, the second one is from the area of the bright yellow patches in the left upper quadrant. Those two pieces of yellow are from the bottom of a cup that had paint from a previous pour. I was able to pull it out, and just pressed it down on the painting. Now I’m going to try and pull it all together using Embroidery Stabilizer.
This painting was originally starged in November 2009, and has lain in my unfinished pile since. Decided it would be a good one to demonatrate the capabilities of using Embroidery Stabilizer, instead of just covering it with a heavy coat of Gesso. To see the process that started the path to the final painting see my post of October 26. (http://merleplaggeart.com/dir/?p=1000)
Initial painting done in 2009, pure acrylic. Called 'Hotseat'
Final painting after treatment with white gesso and embroidery stabilizer as well as watercolor paint and other hand drawn lines and textures.
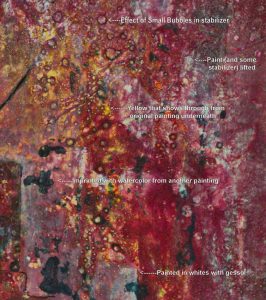
Just below is an enlarged area of the lower right of the painting. It shows annotation of what the various visual textures are a result of.
Thanks much for looking and checking this out. It really is a neat way for redoing an old painting that has not been one of your favorites. Any comments are gratefully appreciated.
Getting just the right amount of visual texture in watermedia abstracts is sometimes difficult, and probably time consuming. I, in my always quest for something new to use in my painting decided to try some embroidery stabilizer that my wife had. Now, I buy it it larger rolls (she doesn’t use it much anymore) since I really like the textures I get when using it, and it also is great for using over a previous painting that never made it to the finished pile.
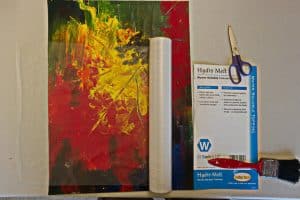
Here’s the process in pictures–as well as text.
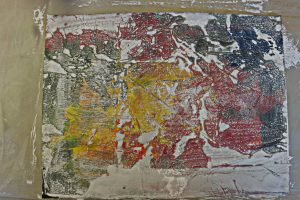
This is the painting I’m going to re-work, showing the roll of Hydro Melt embroidery water-soluble stabilizer. Notice my very finest brush that I use for doing this. The stabilizer cannot be torn, so must be cut with a scissors.Here’s the painting with the watered Gesso and stabilizer over it. The amount of gesso can be adjusted before applying the film.Bright hot sun speeds up drying which otherwise will take 24-36 hours.This is after the first layer of a dark maroon watercolor paint has been applied. Notice how some of the color and previous texture show, in addition to all the new texture from the embroidery stabilizer.
So here are the steps:
With perfectly dry hands, cut a piece of the stabilizer to fit the painting. If your fingers are the slightest bit damp they will stick to the film and tear it when you pull your finger away.
Apply a moderately small amount of gesso to the painting and spread around with a generous amount of water. The amount you have on your paper will determine how much of the painting shows through. I’ve found that I quite often add too much gesso, and have to blot some of it off before applying the film.
Apply the film, being careful not to curl or crease it before putting it down–takes some practice, but is usually easy to do. If I’m doing it on a large piece, I usually have someone help me, to hold up the other side.
Once it’s down in the gushy wet gesso, I usually add some more water to the top as I’m brushing out the wrinkles and air pockets.
Dry it. Doing it outside on a bright sunny day speeds up this process. Otherwise just leave overnight.
Things to remember after the stabilizer has dried:
1. When you add any water based paint on top the stabilizer will start to melt again, and it sort of makes a sticky gooey mess if you stay too long with too many brush strokes. It’s in and out quickly, and let it dry again before doing anything else. I like to add stamp and template sprayed designs on top after an initial wash of watercolor.
2. It’s almost impossible to lift any color once it’s in there. When it is dry you can add something on top easily. This one got pretty dark, so I may have to add something on top to modify it.
I will leave the instructions end here, for completion at a next time. The last picture above awaits more development. Try using the embroidery stabilizer to save a painting that you don’t like or hasn’t made it. You’ll be surprised at what you can do with it. If you do, let me know in the comments. I think you can upload an image there, too. (I’m not sure) Anyway if not, you could e-mail it to me and I’ll add it to a further post.

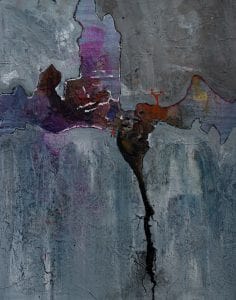 This is called “Cracks” AND I think it has two layers of failed paintings underneath.
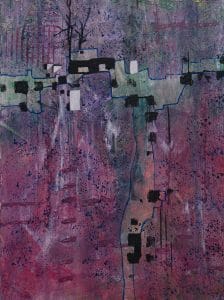 This is “Alien House.”
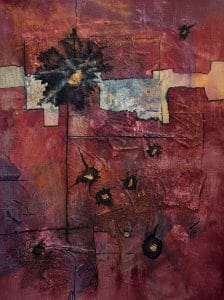 And this is “Acentric Heraldry” and has a couple of layers underneath as well as some thick collage which adds to the texture of this top layer. The small centers of the black spots are pieces of gold colored ribbon.
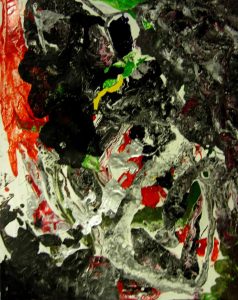
 Now I’m going to try and pull it all together using Embroidery Stabilizer.