
Getting just the right amount of visual texture in watermedia abstracts is sometimes difficult, and probably time consuming. I, in my always quest for something new to use in my painting decided to try some embroidery stabilizer that my wife had. Now, I buy it it larger rolls (she doesn’t use it much anymore) since I really like the textures I get when using it, and it also is great for using over a previous painting that never made it to the finished pile.
Here’s the process in pictures–as well as text.
So here are the steps:
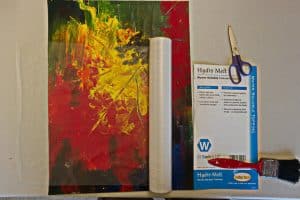
- With perfectly dry hands, cut a piece of the stabilizer to fit the painting. If your fingers are the slightest bit damp they will stick to the film and tear it when you pull your finger away.
- Apply a moderately small amount of gesso to the painting and spread around with a generous amount of water. The amount you have on your paper will determine how much of the painting shows through. I’ve found that I quite often add too much gesso, and have to blot some of it off before applying the film.
- Apply the film, being careful not to curl or crease it before putting it down–takes some practice, but is usually easy to do. If I’m doing it on a large piece, I usually have someone help me, to hold up the other side.
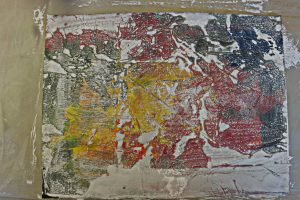
- Once it’s down in the gushy wet gesso, I usually add some more water to the top as I’m brushing out the wrinkles and air pockets.
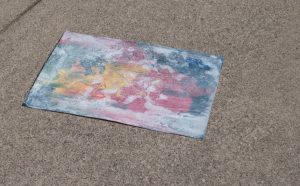
- Dry it. Doing it outside on a bright sunny day speeds up this process. Otherwise just leave overnight.
Things to remember after the stabilizer has dried:
1. When you add any water based paint on top the stabilizer will start to melt again, and it sort of makes a sticky gooey mess if you stay too long with too many brush strokes. It’s in and out quickly, and let it dry again before doing anything else. I like to add stamp and template sprayed designs on top after an initial wash of watercolor.
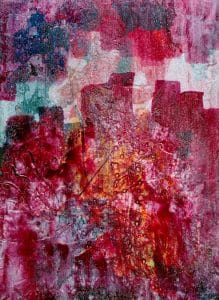
2. It’s almost impossible to lift any color once it’s in there. When it is dry you can add something on top easily. This one got pretty dark, so I may have to add something on top to modify it.
I will leave the instructions end here, for completion at a next time. The last picture above awaits more development. Try using the embroidery stabilizer to save a painting that you don’t like or hasn’t made it. You’ll be surprised at what you can do with it. If you do, let me know in the comments. I think you can upload an image there, too. (I’m not sure) Anyway if not, you could e-mail it to me and I’ll add it to a further post.
I havent painted in about one week – just busy with Christmas preparations…. but reading your posts makes me want to get back into my studio again! I have to find the stabilizer that you gave me some time ago – it sounds very interesting – Helga
It really is a different way of getting texture in under layers.
Wow..Thanks. After that build up I hope it turns out as planned.