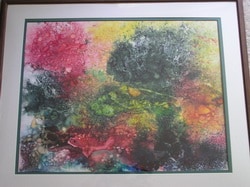
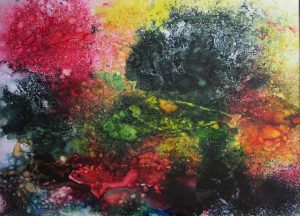
First–A a couple pictures of the problem of photographing your image after framing in glass or Plexiglas.
Here’s a photo of a painting after framing.


Best results with post processing on framed first image.
And Here’s before framing. What a difference.

Camera Requirements and Basic Settings
Most newer cameras, including cell phone cameras do a great job with recording your image if you have heeded the preliminary requirements listed in Part I. If your venue requires images suitable for publishing in a catalog a phone camera usually produces images which are a little on the small side. The image file after processing needs to be 0.8 to 1.5 MB in size. Having a camera with an adjustable shutter and lens aperture will make the process much easier in every step, and give you sufficient size for publication.
You will need some means to hold the camera steady with the sensor plane parallel to the painting surface. If you have good lighting your shutter speed will be fast enough to hand hold. There is no need for extra depth of field, so use an aperture that’s wide open, and set your camera on Aperture Priority. Set the ISO no higher than 400. If you are photographing several paintings, mounting your camera on a tripod will help speed things up.
If your piece is mostly white or light colors, you may need to increase your exposure a little if possible, as your camera’s exposure is based on 18% gray, which is darker than light colored paintings and lighter than dark color paintings. If the image is too dark and no way to set the exposure, it can be corrected on your computer later. Also for overexposed images with dark or black pieces you may need to decrease the exposure if possible.
When you photograph 3-D pieces you need to make sure your background is bare. Hanging a black or white cloth so that it covers the entire field of view of your camera is an absolute necessity.
Next time I’ll wind this up with a couple notes about post-processing.

Good