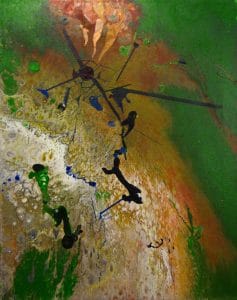
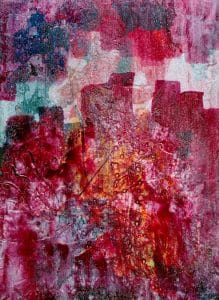
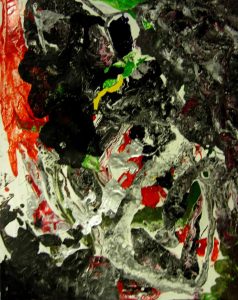
This started out as a quite nice large swipe pour on a 26×20″ Yupo. There were a few details I wanted to change, but started using it as a spot to experiment with. Since then it’s gotten three layers of pours and various other splashes of acrylic paint on it, so it’s quite thick and getting heavy–but I can still lift it, so wil keep going on it. Here’s what it looks like now.
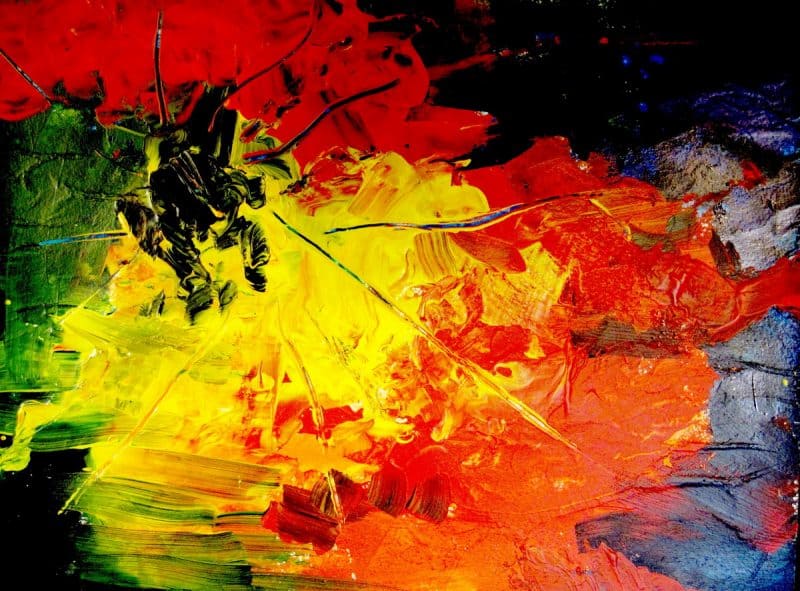
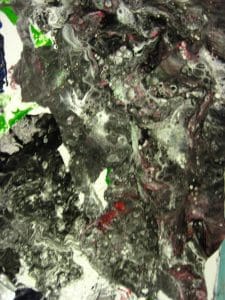
And, below are two close-ups of areas of particular interest, especially from the viewpoint of a pour. You’ll also notice there’s lots of color and contrast, and a marked disjointedness of the whole thing. Here’s those two areas of interest. The first is the right upper corner where I just poured some paint and then moved it around by blowing at it with a straw. I was surprised at the effect this had.
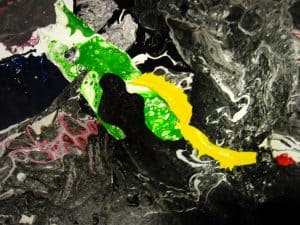
Then, the second one is from the area of the bright yellow patches in the left upper quadrant. Those two pieces of yellow are from the bottom of a cup that had paint from a previous pour. I was able to pull it out, and just pressed it down on the painting. Now I’m going to try and pull it all together using Embroidery Stabilizer.
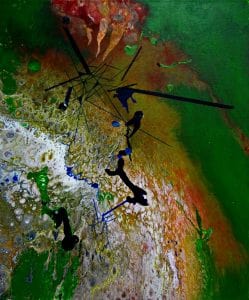
This piece was started as a pour demonstration. It was poured on a large 30×20″ black Foamcore board. It started out looking beautiful, with strong and varied cells throughout, and with three jabs of the large piece of Yupo I was using to swipe with. But unfortunately the board started buckling mainly longitudinally, so most of the cells ran off the sides long before it had set up.
I’ve added a couple of black lines to it to emphasize the three diagonally oriented lines, that strongly remind me of cattails in the swamp near us. I did another piece very similar colors but used Yupo as the medium for it. Turned out much better. I’ll show that next time as I’m still adding some details to it.
Thanks for looking. Do you see anything that needs correcting or adding. Love to hear your comments–any way you see it.
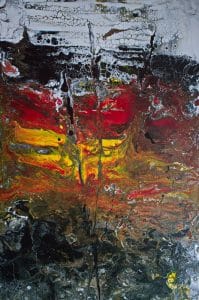
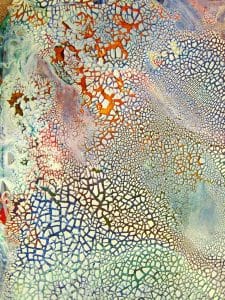
This painting was originally starged in November 2009, and has lain in my unfinished pile since. Decided it would be a good one to demonatrate the capabilities of using Embroidery Stabilizer, instead of just covering it with a heavy coat of Gesso. To see the process that started the path to the final painting see my post of October 26. (http://merleplaggeart.com/dir/?p=1000)
Initial painting done in 2009, pure acrylic. Called 'Hotseat'
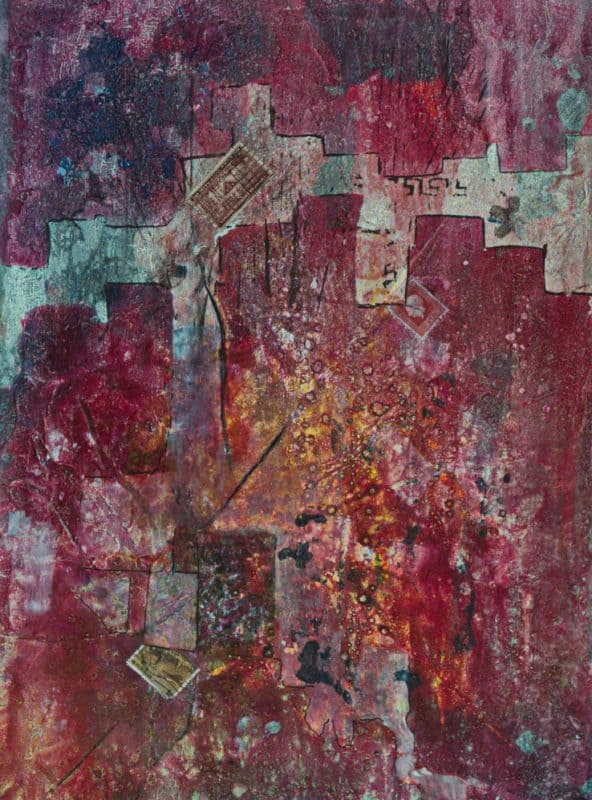
Final painting after treatment with white gesso and embroidery stabilizer as well as watercolor paint and other hand drawn lines and textures.
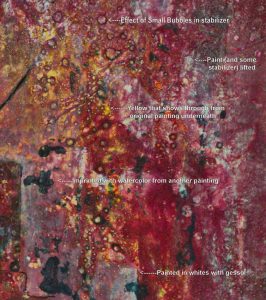
Just below is an enlarged area of the lower right of the painting. It shows annotation of what the various visual textures are a result of.
Thanks much for looking and checking this out. It really is a neat way for redoing an old painting that has not been one of your favorites. Any comments are gratefully appreciated.
High Wire Act 20×16″ on stretched cotton canvas Most of the larger shapes are dried skins from pours. The fine lines and straight lines are archival markers.
I’ve been looking at this for a couple weeks and can’t decide anything to add, so I’ll call it finished. I won’t varnish it just yet–keeping it out of sight for a while will give me fresh eyes to see it again in a couple months and then prepare it for selling.
For an earlier version of this piece see my post of October 14, 2017. Any comments? Thanks for visiting.
A Review of methods of producing crackled texture effects in paintings.
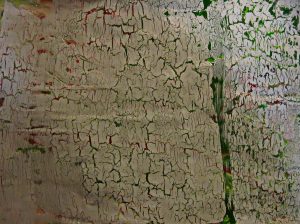
Crackle Paste – A Golden product that requires a rigid substrate and thick application. Doesn’t work on Yupo or paper. Somewhat chalky.
Kroma Crackle – from Kroma Industries. Relatively new product. Thinner application and can be used on flexible substrate. Takes a long time to dry–even in the winter time with humidity low in the studio. It is somewhat fragile when it starts to dry. Can easily be limited to smaller areas. Dries to a chalky white color, with the darker color underneath as the cracks. Then it can be painted on top as desired, with either watercolor or acrylic paint.
Kroma Crackle – after completely dry. Cracks vary according to the thickness of the application. A few pieces of the dry compound have brushed off in handling.
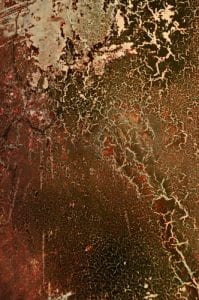
Crackle Glaze – made by Poly Vine Industries. Designed to be used with flat Latex paint. Gives interesting cracked effect. And looks good, and probably can easily be localized as needed and still look natural.
Surface after Crackle Glaze used. On the left hand two thirds it was painted with a very light blue latex interior paint. On the right I used gesso, tinted a bit with blue India ink.
Stamping – totally repetitive and no control over size of crackles. The stamp I have has rather large spaces.
Organic based spray paint over water wetted substrate. Can be on a flexible substrate, but very unstable and fragile till coated with fixative of some sort. I have used this in multiple paintings on Yupo with good, quite subtle results. Generally limited to small areas. Not predictable size of cracks.
Black commercial spray paint (in pressurized cans) over a wet surface of reddish acrylic paint.
Dirty Pour – simulates crackling a little bit in some areas, but totally unpredictable and very hard to control in all aspects.
Hand painting … very tedious and almost impossible to get looking natural.
Conclusion: come back next time, hopefully in a few days. In the meantime, thanks for reading, and if you have any questions or additions please comment. The link is just under the title.
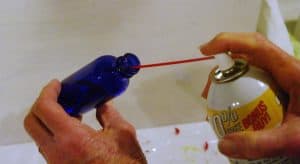
People have complained about the smell of using Silicone spray in doing their dirty pours. The solution is two-fold: Use an already liquid silicone oil, or make your own oil. I have a 2 oz. dropper bottle that I take outside and spray the silicone from the pressurized container into the bottle. This eliminates the odor of the spray itself when using it indoors. Then I can just add 5-8 drops of this silicone to each color cup with almost no odor.
Here’s the way it looks:
Notice the tip of the tubing is a little less than half way into the bottle. This allows the liquid silicone to run into the bottom of the bottle and the propellant to come out without loss of the oil. Also note that I’m spraying into the side of the bottle.
Have you found any other ways of dealing with the odor of the spray? If so please say in the comments. Thanks.
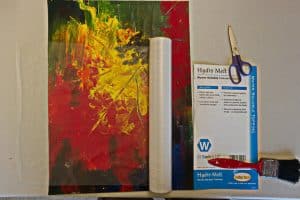
Getting just the right amount of visual texture in watermedia abstracts is sometimes difficult, and probably time consuming. I, in my always quest for something new to use in my painting decided to try some embroidery stabilizer that my wife had. Now, I buy it it larger rolls (she doesn’t use it much anymore) since I really like the textures I get when using it, and it also is great for using over a previous painting that never made it to the finished pile.
Here’s the process in pictures–as well as text.
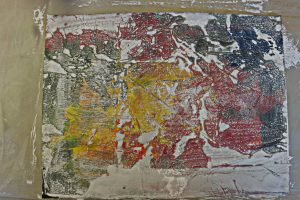
This is the painting I’m going to re-work, showing the roll of Hydro Melt embroidery water-soluble stabilizer. Notice my very finest brush that I use for doing this. The stabilizer cannot be torn, so must be cut with a scissors.Here’s the painting with the watered Gesso and stabilizer over it. The amount of gesso can be adjusted before applying the film.Bright hot sun speeds up drying which otherwise will take 24-36 hours.This is after the first layer of a dark maroon watercolor paint has been applied. Notice how some of the color and previous texture show, in addition to all the new texture from the embroidery stabilizer.
So here are the steps:
With perfectly dry hands, cut a piece of the stabilizer to fit the painting. If your fingers are the slightest bit damp they will stick to the film and tear it when you pull your finger away.
Apply a moderately small amount of gesso to the painting and spread around with a generous amount of water. The amount you have on your paper will determine how much of the painting shows through. I’ve found that I quite often add too much gesso, and have to blot some of it off before applying the film.
Apply the film, being careful not to curl or crease it before putting it down–takes some practice, but is usually easy to do. If I’m doing it on a large piece, I usually have someone help me, to hold up the other side.
Once it’s down in the gushy wet gesso, I usually add some more water to the top as I’m brushing out the wrinkles and air pockets.
Dry it. Doing it outside on a bright sunny day speeds up this process. Otherwise just leave overnight.
Things to remember after the stabilizer has dried:
1. When you add any water based paint on top the stabilizer will start to melt again, and it sort of makes a sticky gooey mess if you stay too long with too many brush strokes. It’s in and out quickly, and let it dry again before doing anything else. I like to add stamp and template sprayed designs on top after an initial wash of watercolor.
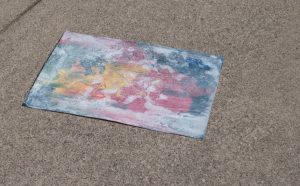
2. It’s almost impossible to lift any color once it’s in there. When it is dry you can add something on top easily. This one got pretty dark, so I may have to add something on top to modify it.
I will leave the instructions end here, for completion at a next time. The last picture above awaits more development. Try using the embroidery stabilizer to save a painting that you don’t like or hasn’t made it. You’ll be surprised at what you can do with it. If you do, let me know in the comments. I think you can upload an image there, too. (I’m not sure) Anyway if not, you could e-mail it to me and I’ll add it to a further post.
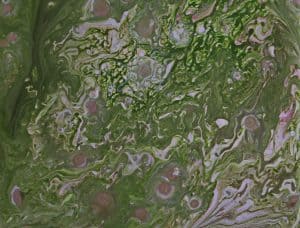
I did a swipe pour on a 20×16″ canvas. I didn’t keep it very level and a lot of the cells just ran off the side. Didn’t like the look of the canvas texture either. I thought it might make a good background for a painting. Started adding things, first some straight lines, and then followed some of the lines in the original background with the same pen. Made a variety of lines, but it still didn’t seem to say anything. Went back to look at some of the freezer paper that had all the drippings/skins from previous pours, and found just the right colors. Since they were a couple weeks old, they peeled off the paper easily and I applied them directly to the background. They stick well when pressed down. Don’t leave them too long as they become permanently adherent. So, now I’m not going to throw any papers away that have drips on them.
Here’s the result so far. I’m going to add some more details to it with skins before it’s finished. I think it’ll be called High Wire Act.
Paint skins from drips off dirty/swipe pours.
Thanks for reading. I hope this was helpful and gave you some ideas. If you have any comments or suggestions please say in the comments.
A couple of people have asked me what does the silicone do, is it necessary?
The short answer is yes, for sure it’s needed, although sometimes you can get fair cells without it, by using alcohol instead of silicone.
How does it work? I’m not sure, but I think it’s action is in rising to the surface through the layers of paint, causing them to layer on the outside of the silicone oil as it’s rising through the paint layers. It’s all based on the Specific gravity of the paints which goes where.
Here are two tiles, made from the same paint mixture–the first one didn’t have any silicone or alcohol added. The second had about 7-10 drops of silicone in each color. I tried to add about the same amount of each paint.
No silicone added to any of the paint mixtures. Tan area are the tile showing through–possibly dirty (greasy) tile.Same mixture of paint, with added 10 drops of silicone to each color before putting them together.
I hope this information has been useful to you. If you have anything to add or coment on please do so in the comments.
At our regular October meeting of the Southwest Michigan Watercolor Society in Battle Creek this past Monday, the 1st of October, I talked and gave a demo of acrylic pouring with media to dilute the acrylic paint and create cells using silicone. I used my usual Blick Acrylic fluid paints and PaintEasy. Also tried some old Lucas Acrylic paint that I had. Some of it seemed to coagulate when I added RainX to it. Did a couple of dirty pours and swipe pour. on a new material that Joanna Learner had brought–seems like a thick Yupo. Unfortunately it was not flat, so though the pour had great cells, a lot of them ran off afterwards.
Here’s the pics of the pours:
Swipe Pour-About 12×12. Notice how the cells are all run off all the sides. The few in the center have stayed the same.This is the second pour I did–it’s on an 8″ tile and I was able to lay it perfectly flat. Will be interesting next month when we meet again what has happened to them.

 Now I’m going to try and pull it all together using Embroidery Stabilizer.